How to Get WhatsApp API for Free
Make sure you've already created a Business Portfolio before starting this. Even if you do not have a registered business, you need to create a business portfolio, and it will stay "unverified", which is ok.
- Go to developers.facebook.com/apps and create a new App (Meta's general Create an App doc covers this step for any app type, if you want more detail).
-
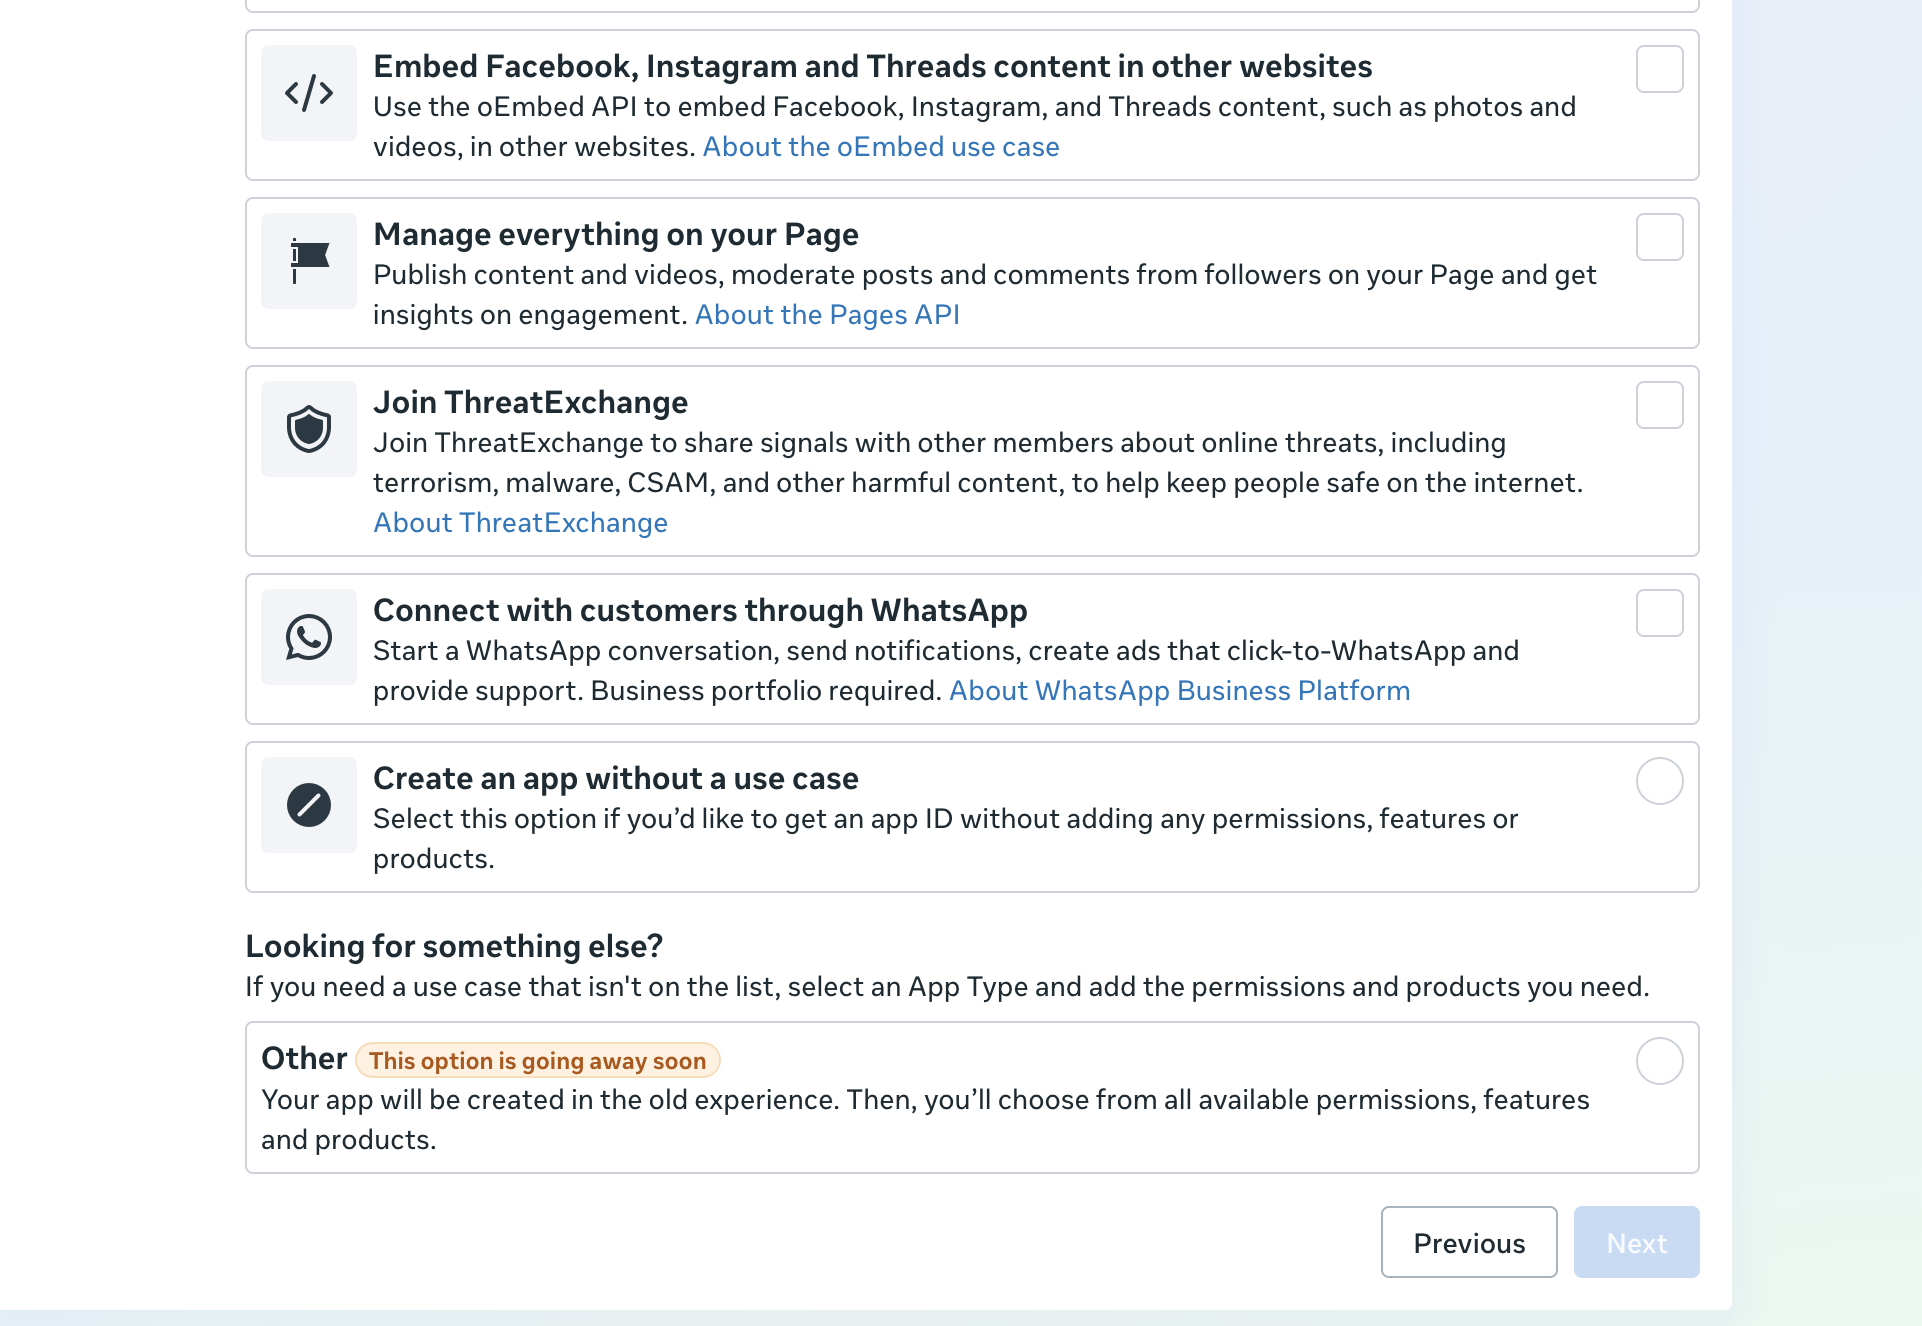
When asked what you want your app to do, choose the
"Connect with customers through WhatsApp" use case (not
"Create an app without a use case" or "Other") — this adds the WhatsApp
product, described in Meta's
WhatsApp Business Accounts
doc, along with the
whatsapp_business_messaging/whatsapp_business_managementpermissions, automatically.
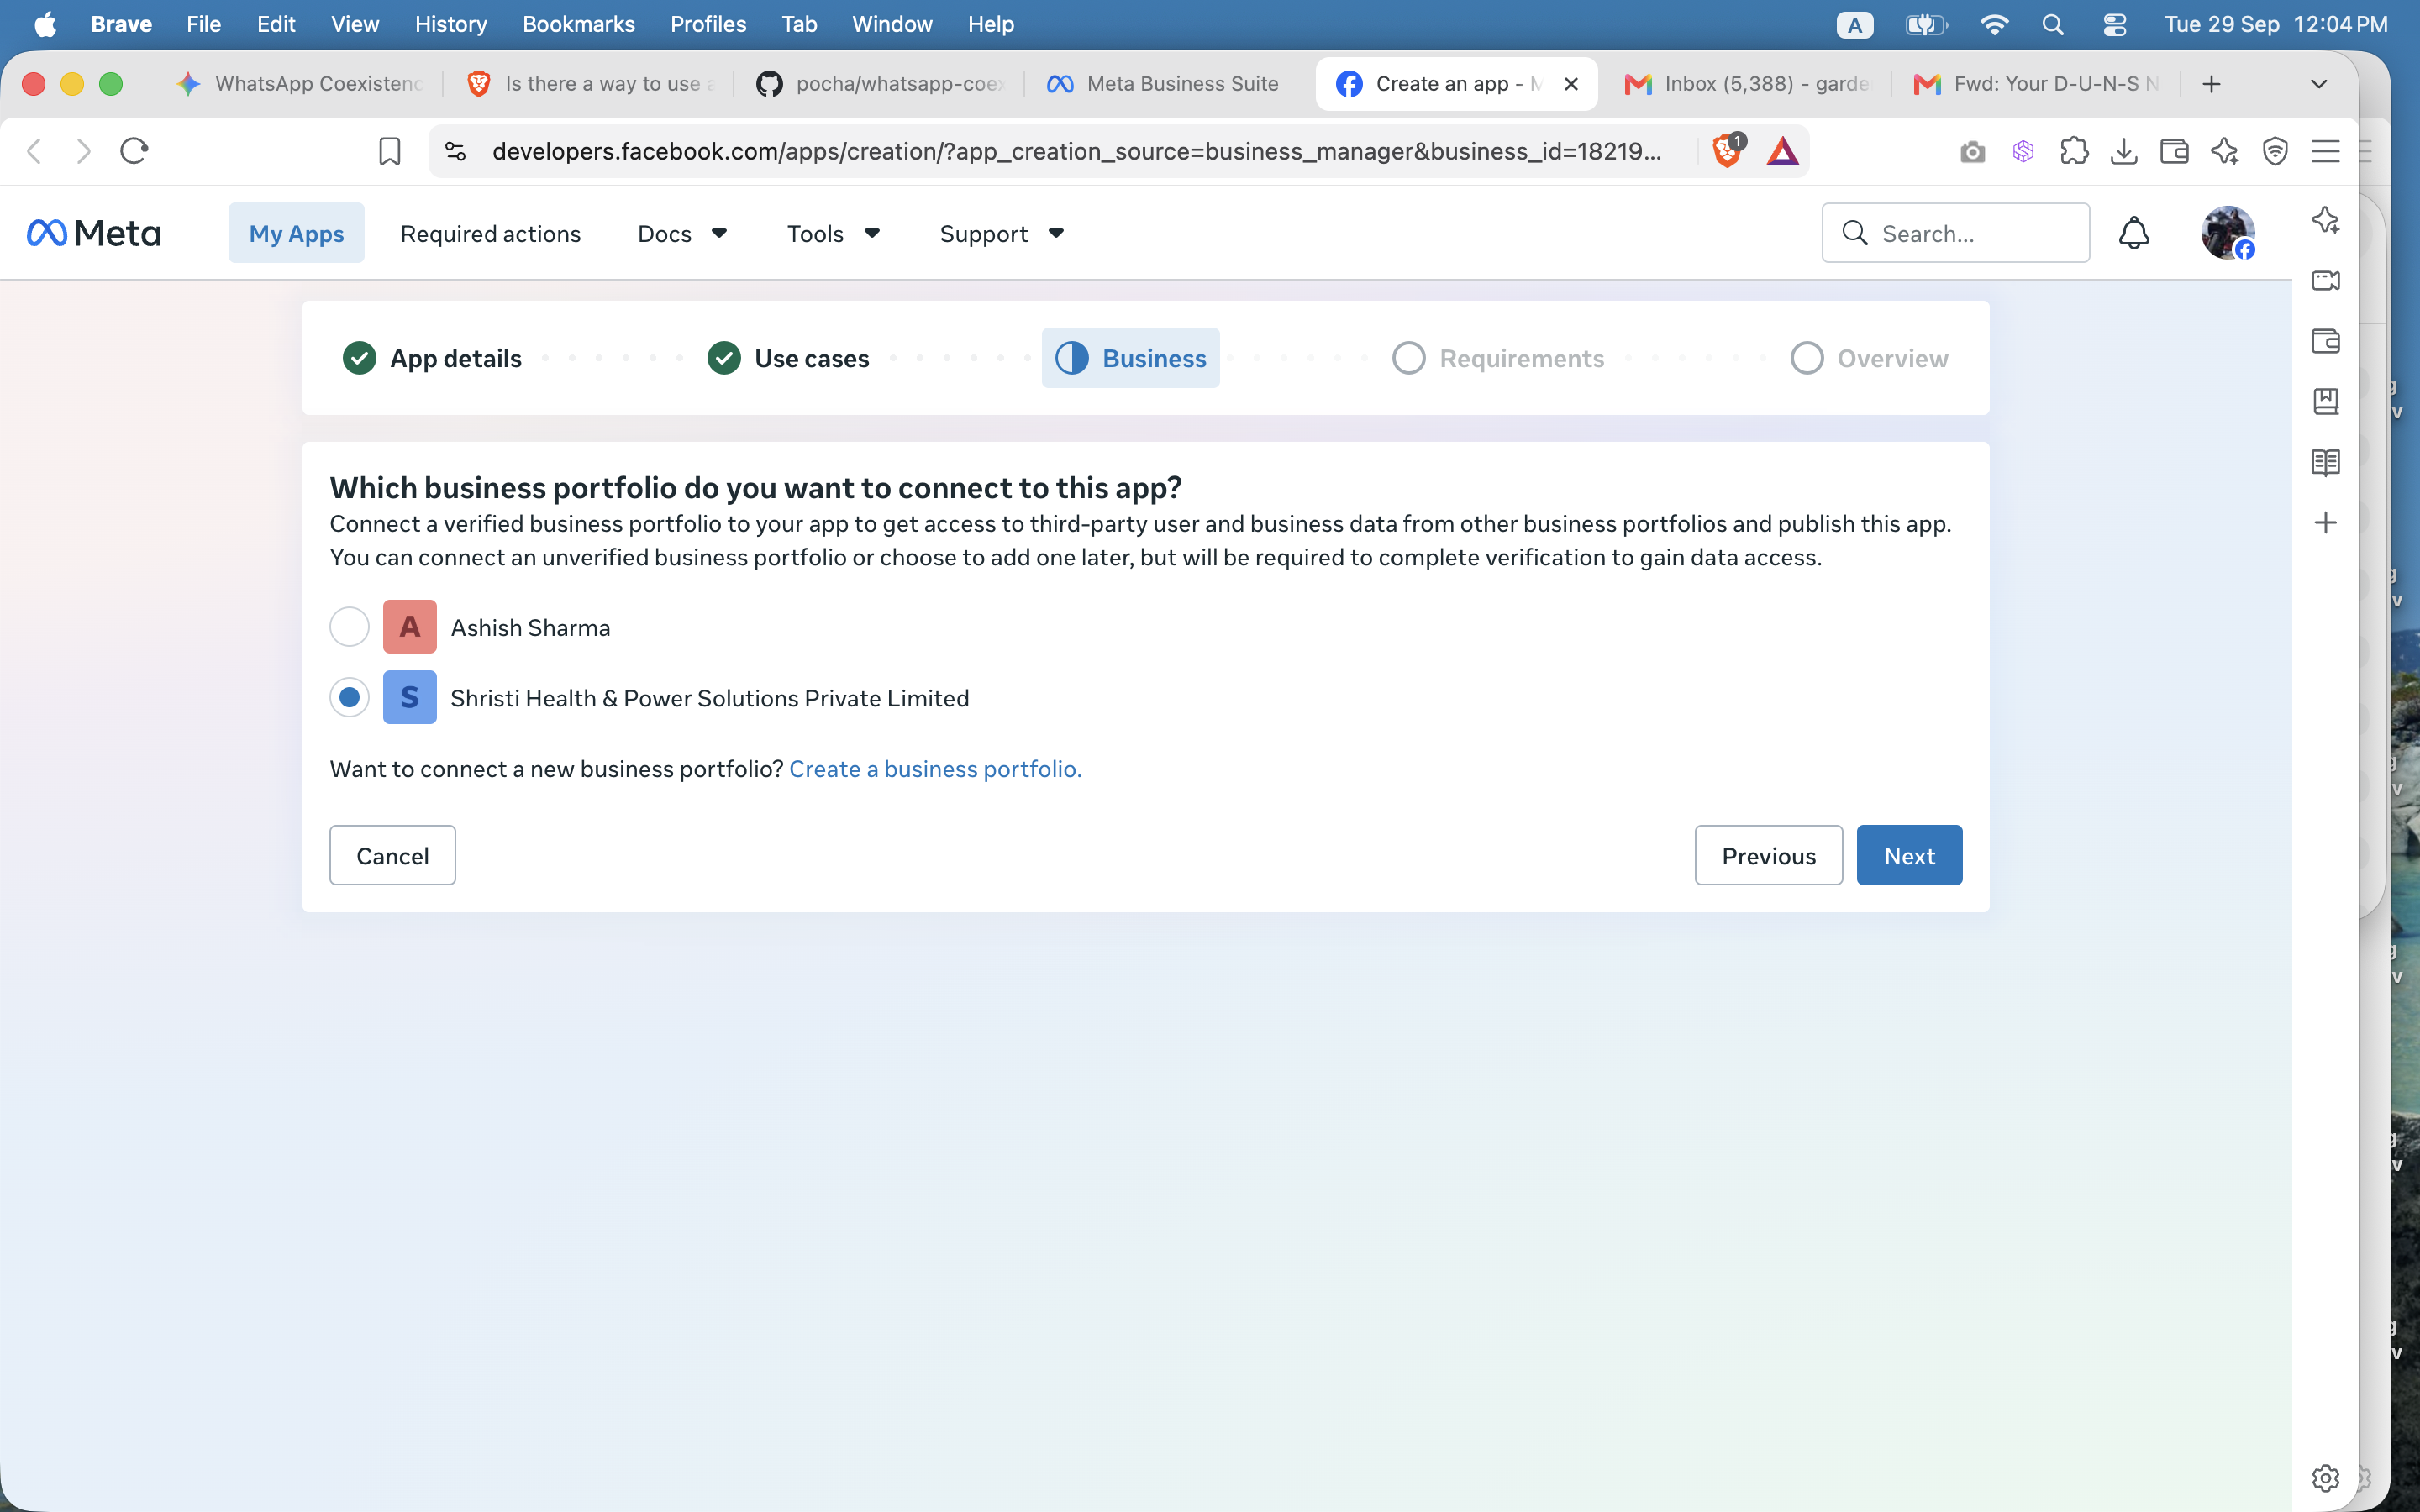
- On the Business step, select the Business Portfolio you created earlier (not your personal profile) and continue.
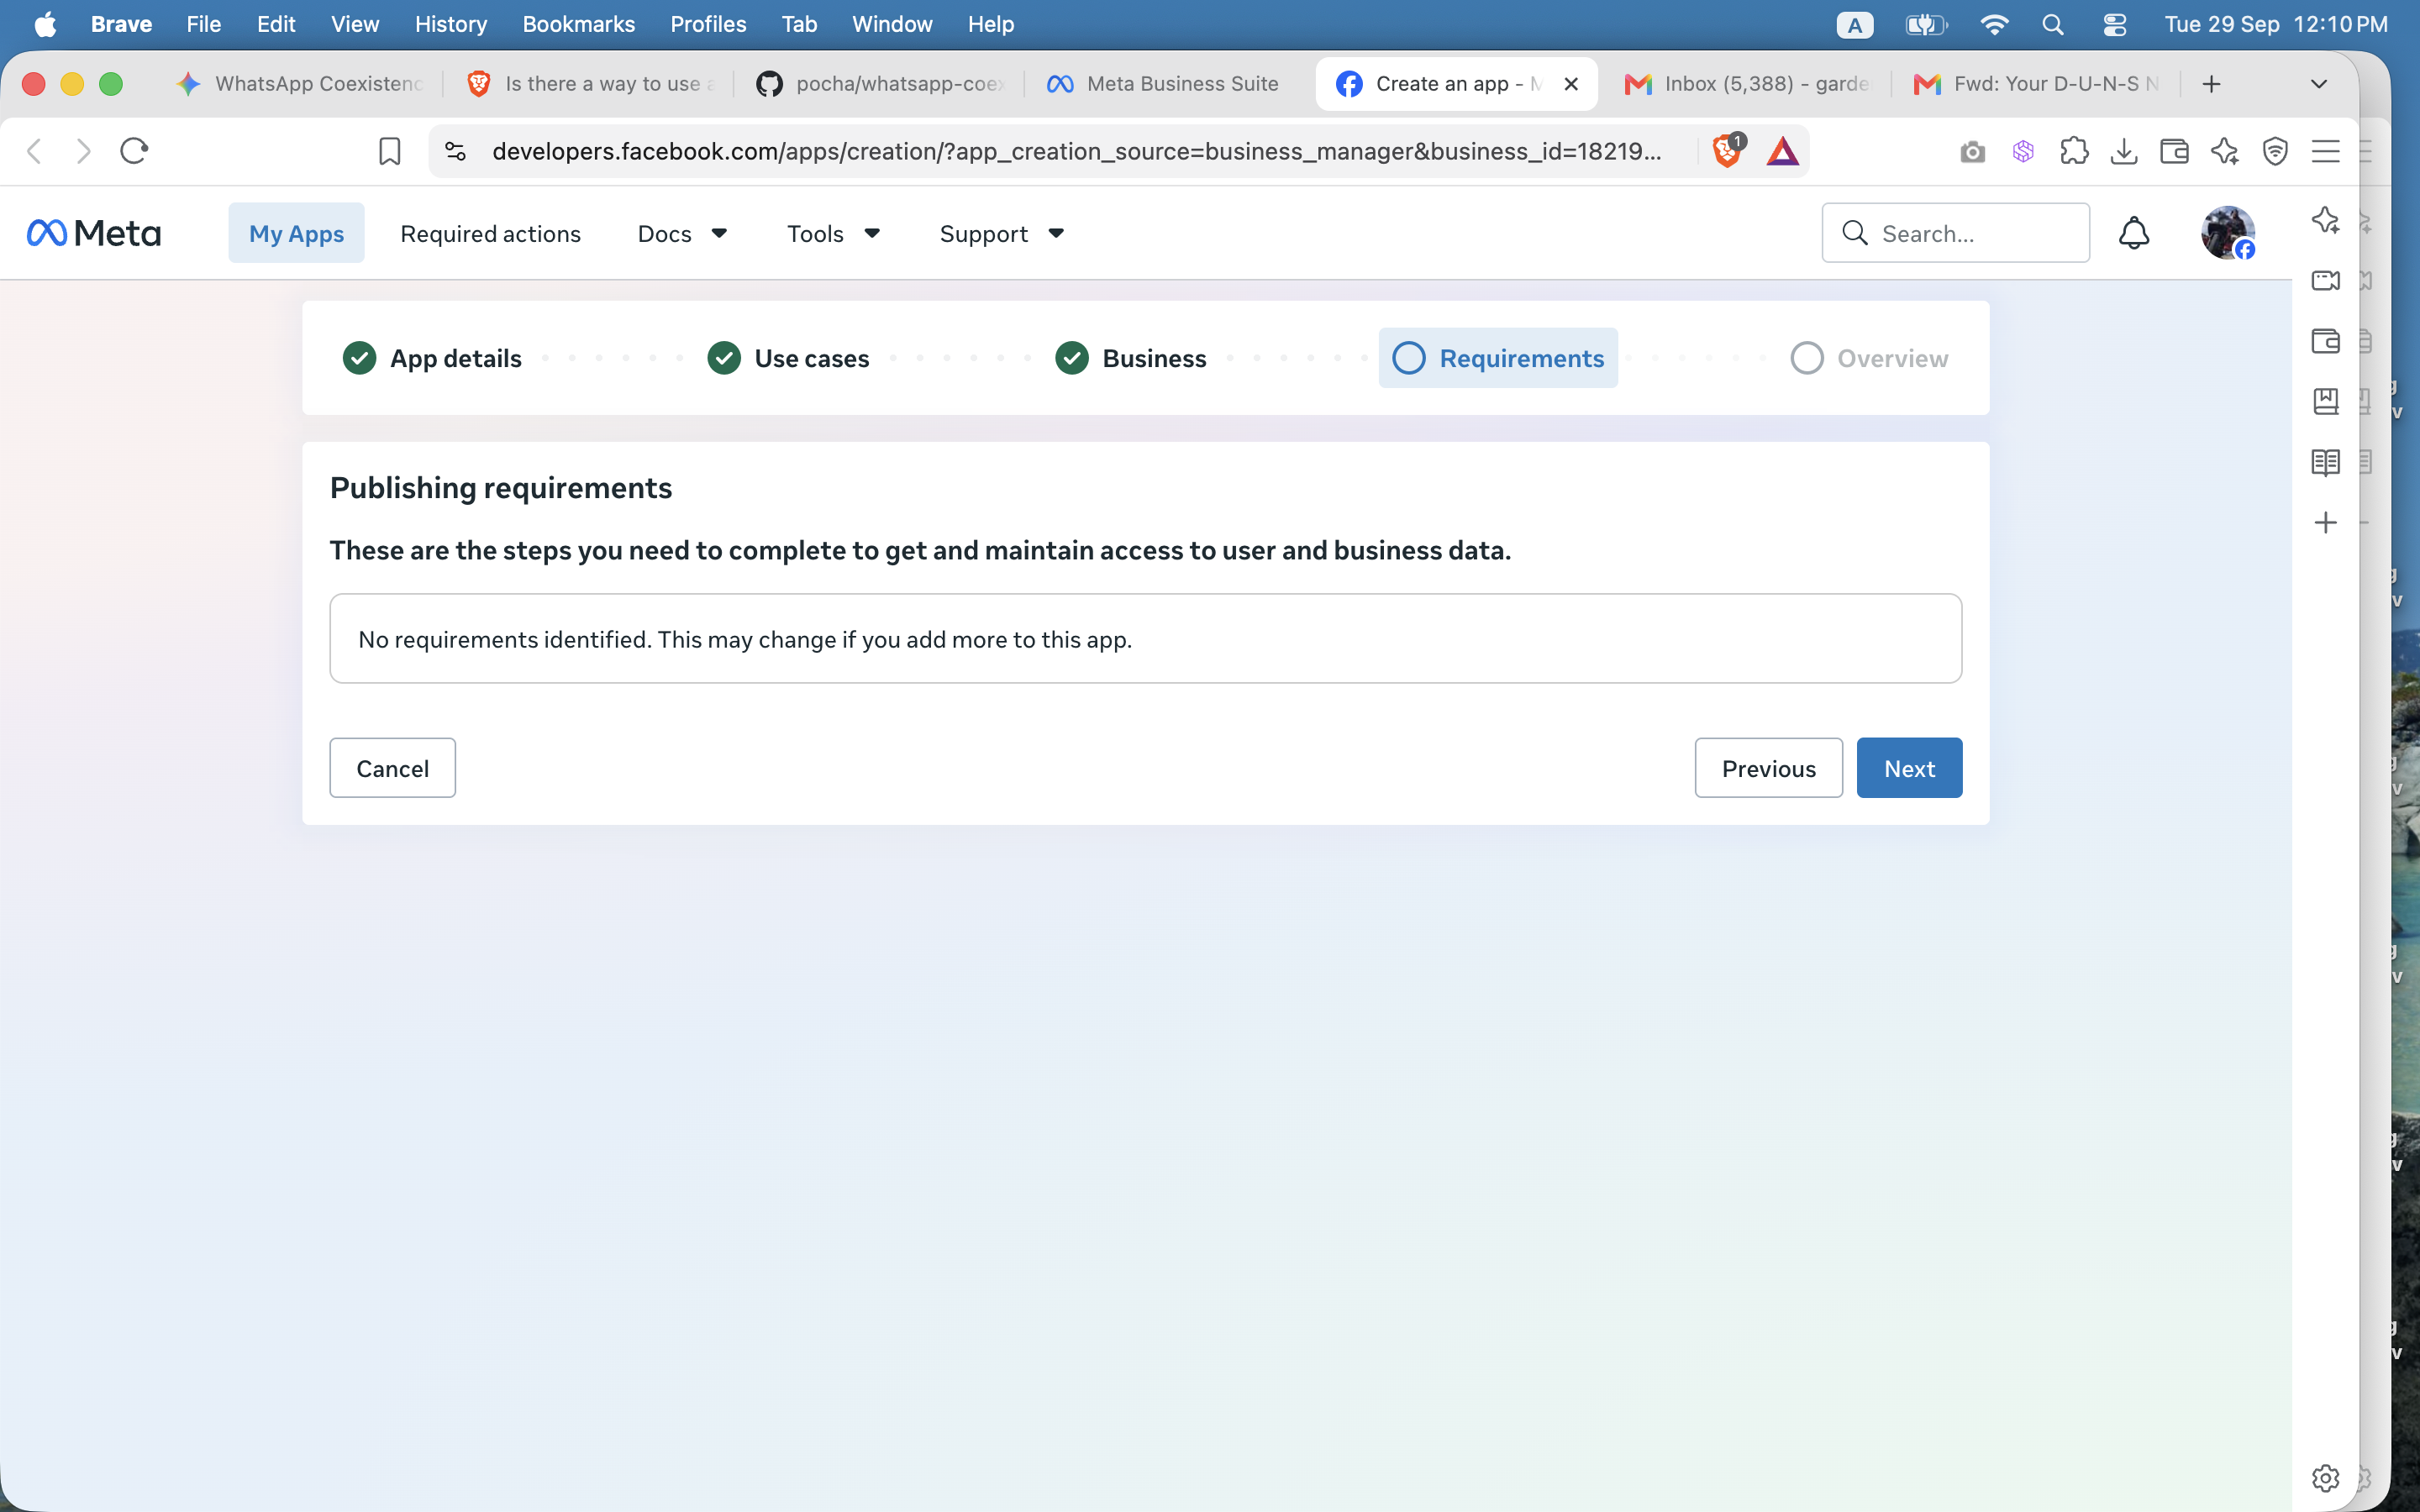
- On the Requirements step you'll likely see "No requirements identified." That's expected, not an error — using the API for your own number (rather than building a platform for other businesses) doesn't require anything extra here. Click Next.
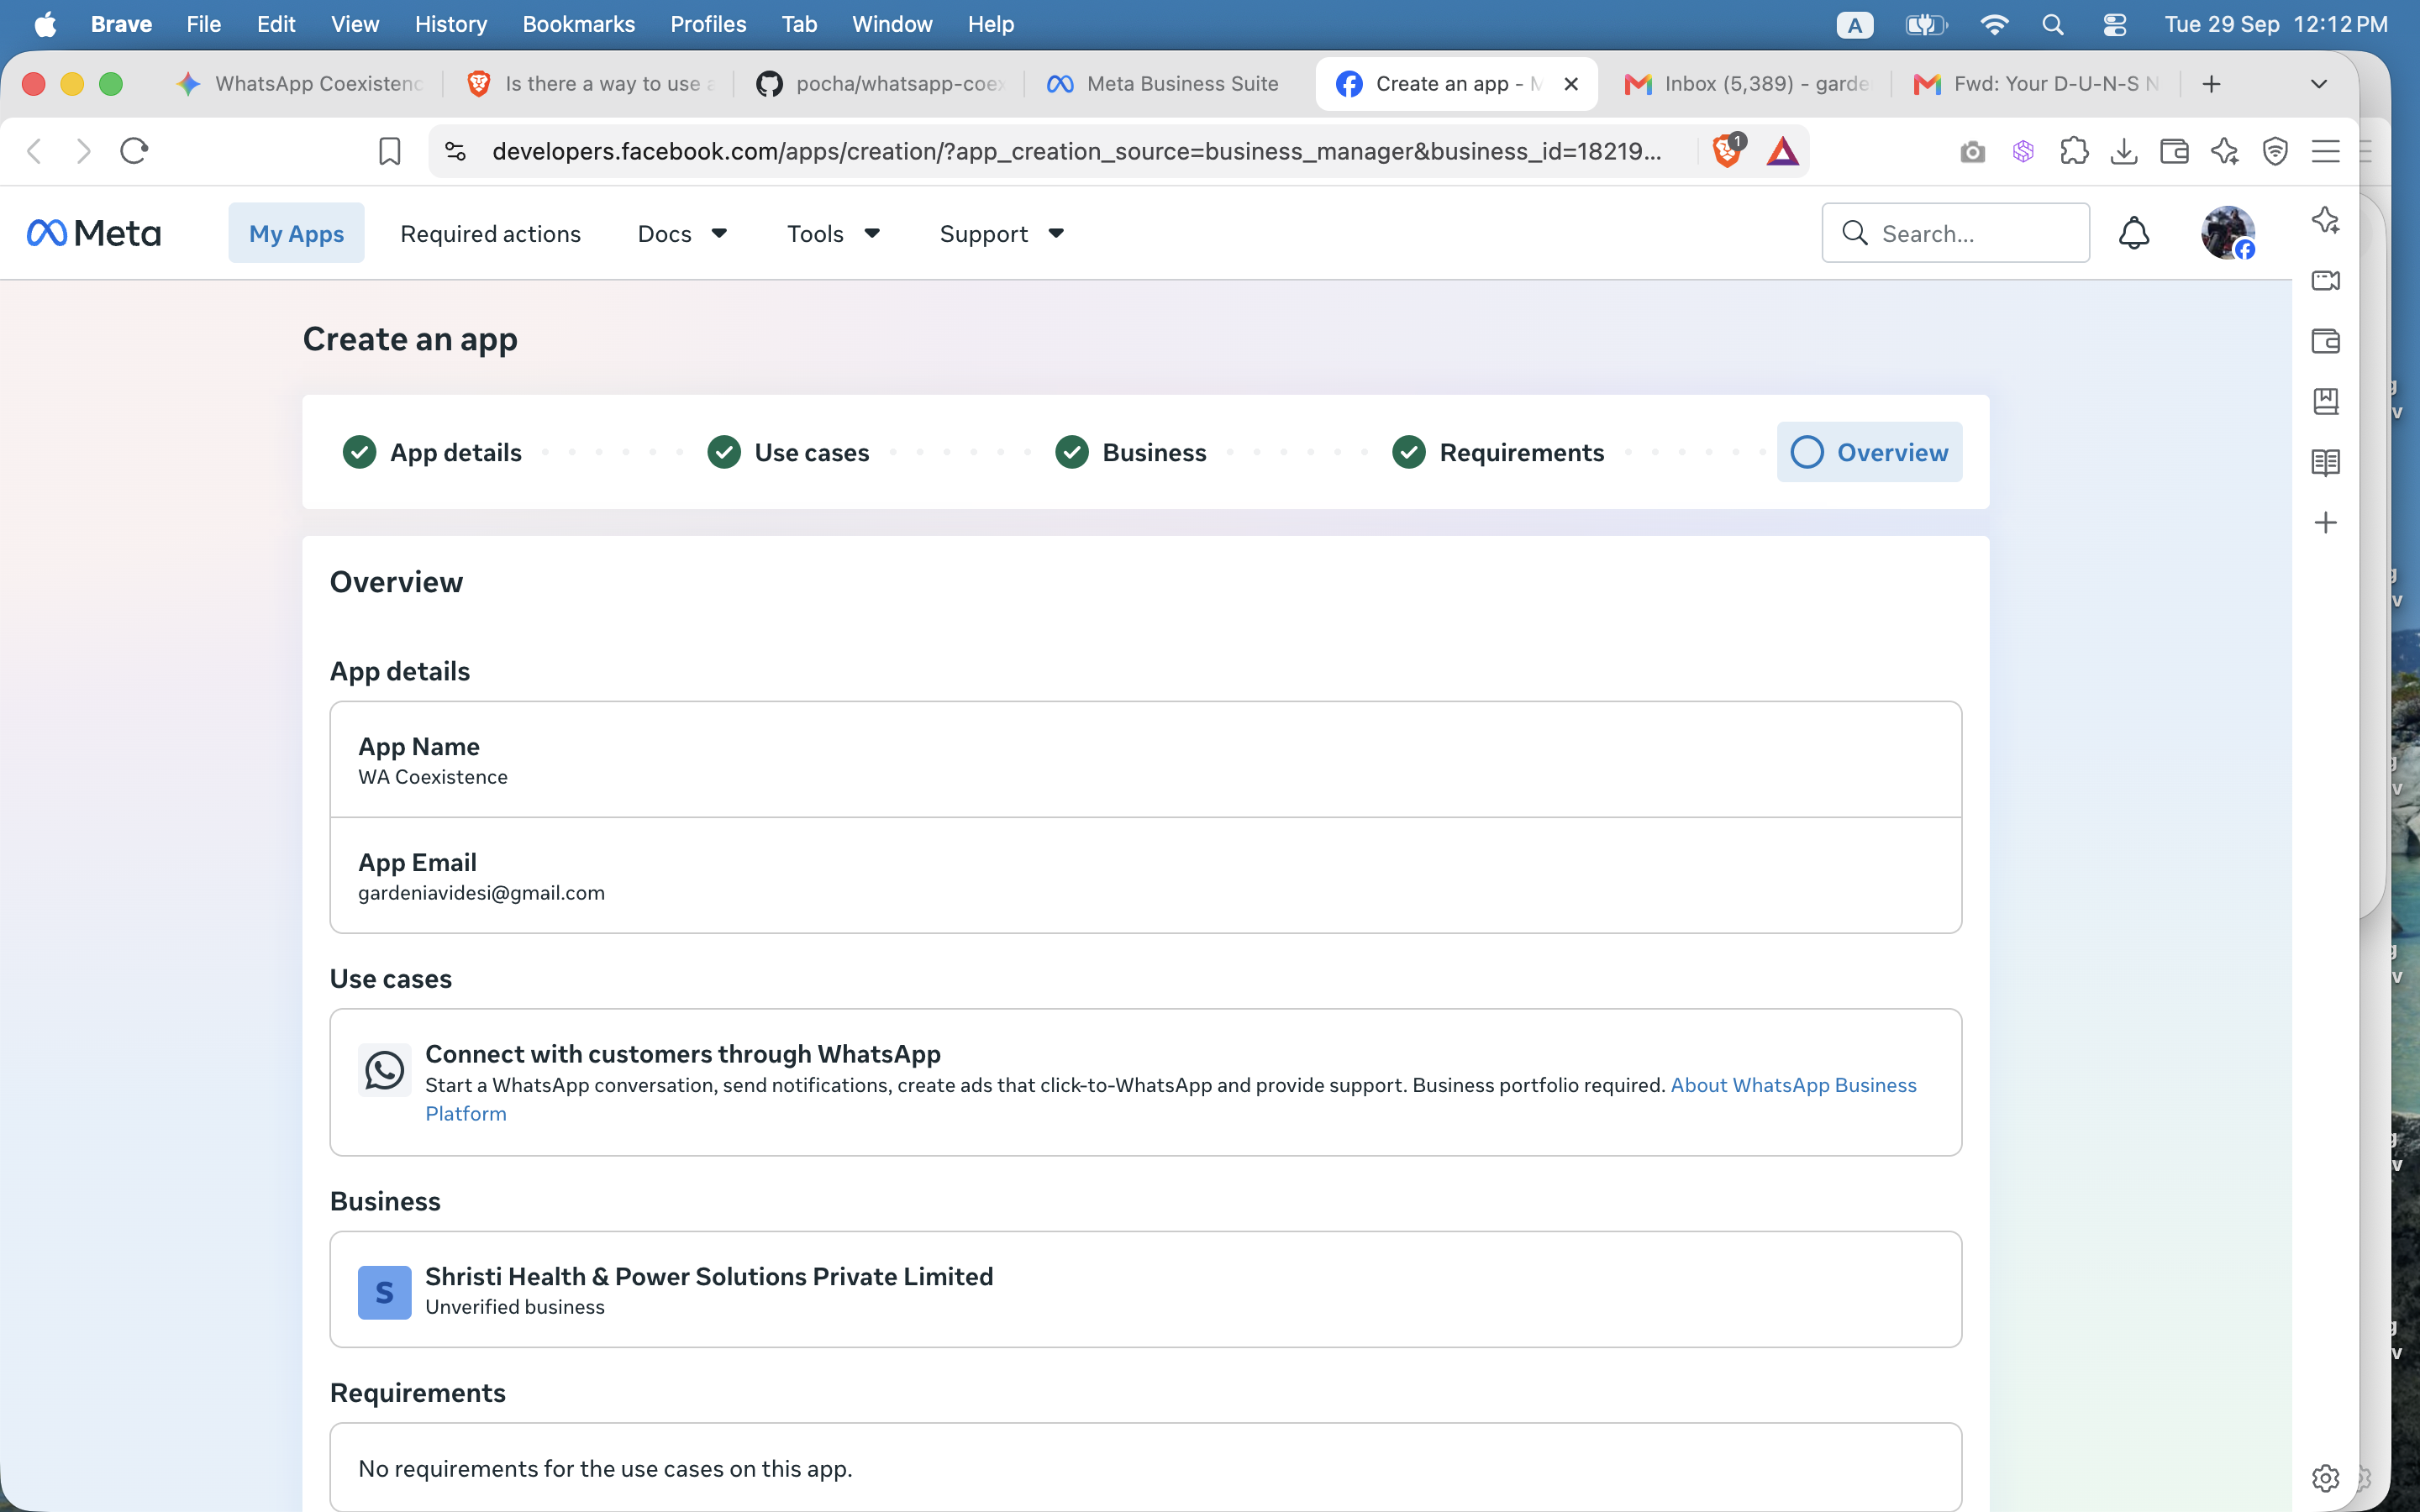
The final overview — confirm everything looks right, then finish creating the app. (The app name shown here, "WA Coexistence", is ours — name yours whatever you like.)
Set up the WhatsApp use case
Once the app is created you land on its dashboard. Your app can already use the WhatsApp API under Standard Access, which is all a business needs on its own number. Click Customize the Connect with customers through WhatsApp use case.
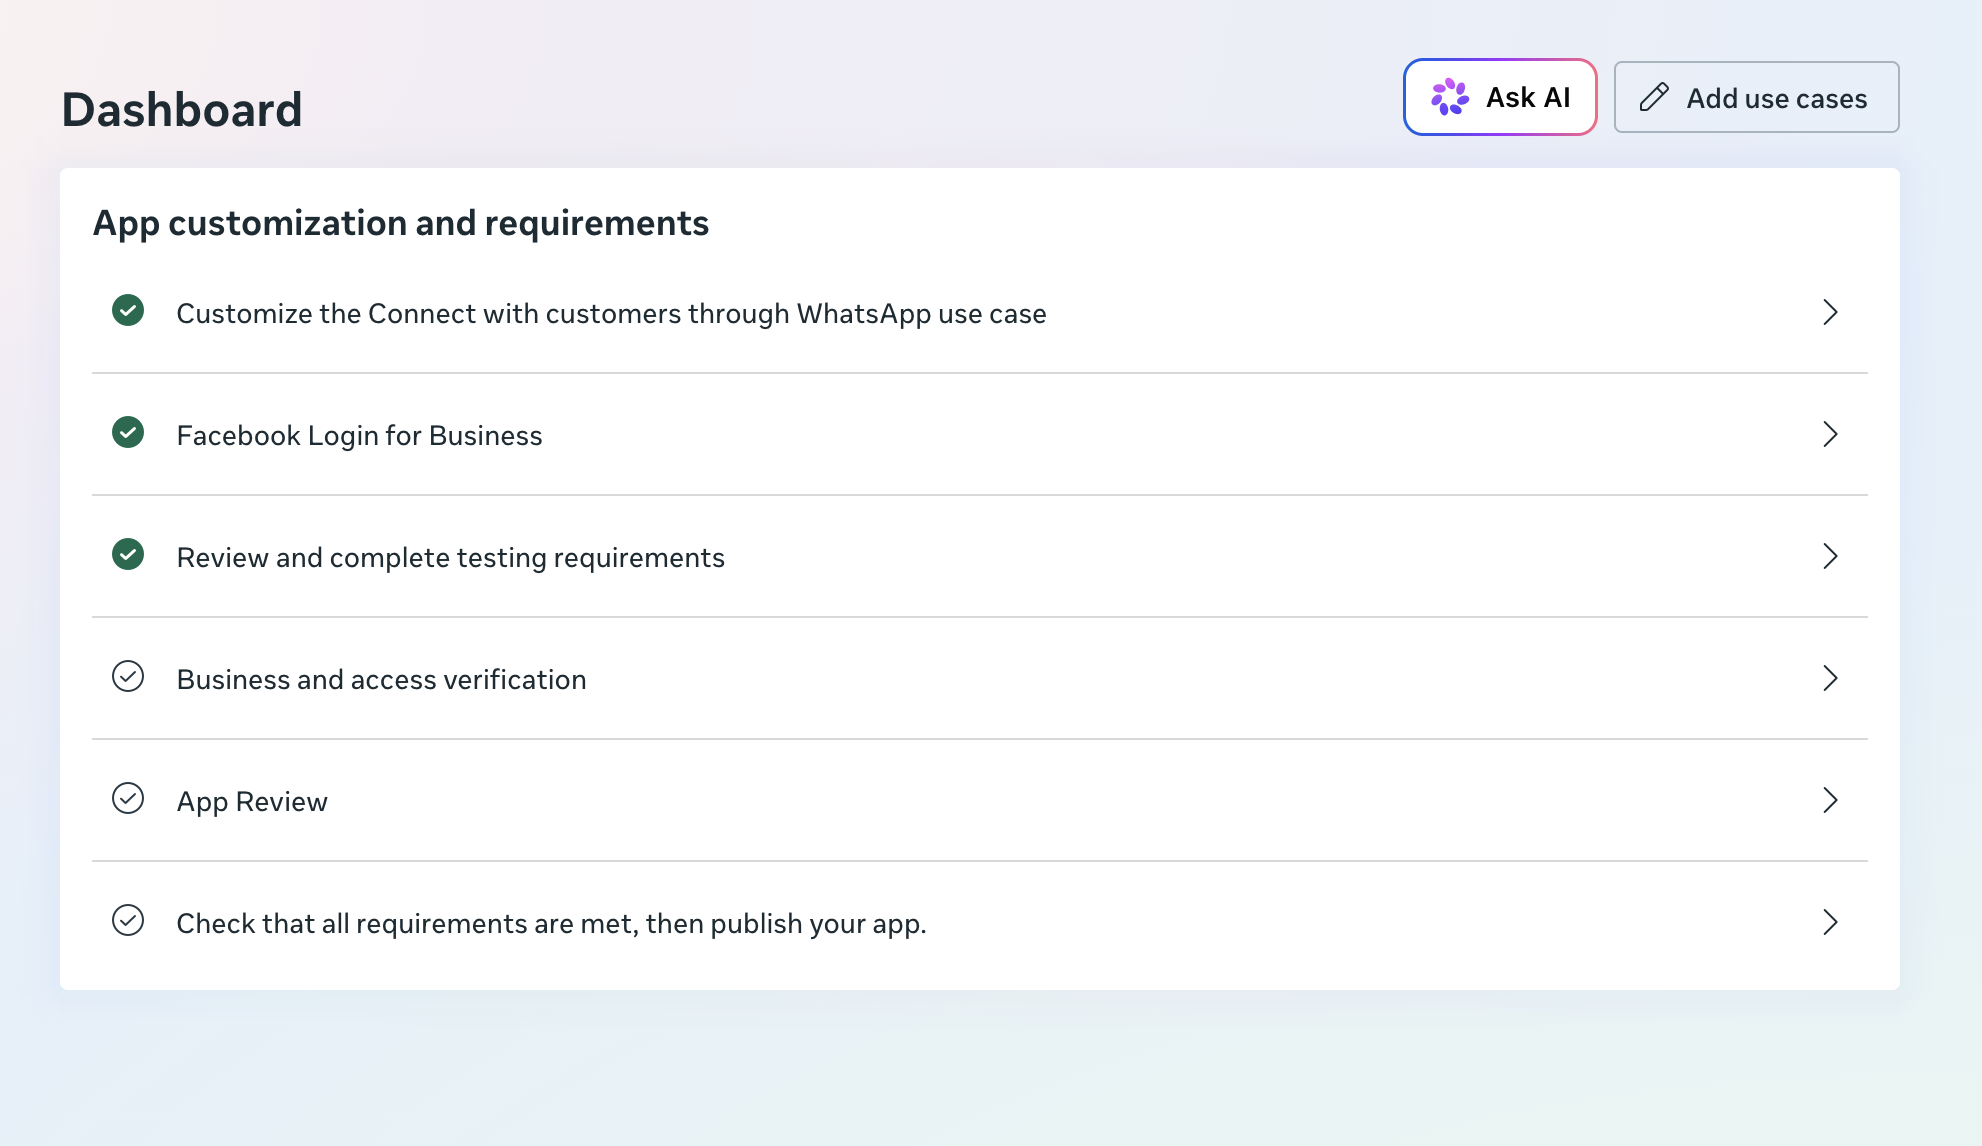
Your checklist may show fewer items than this one.
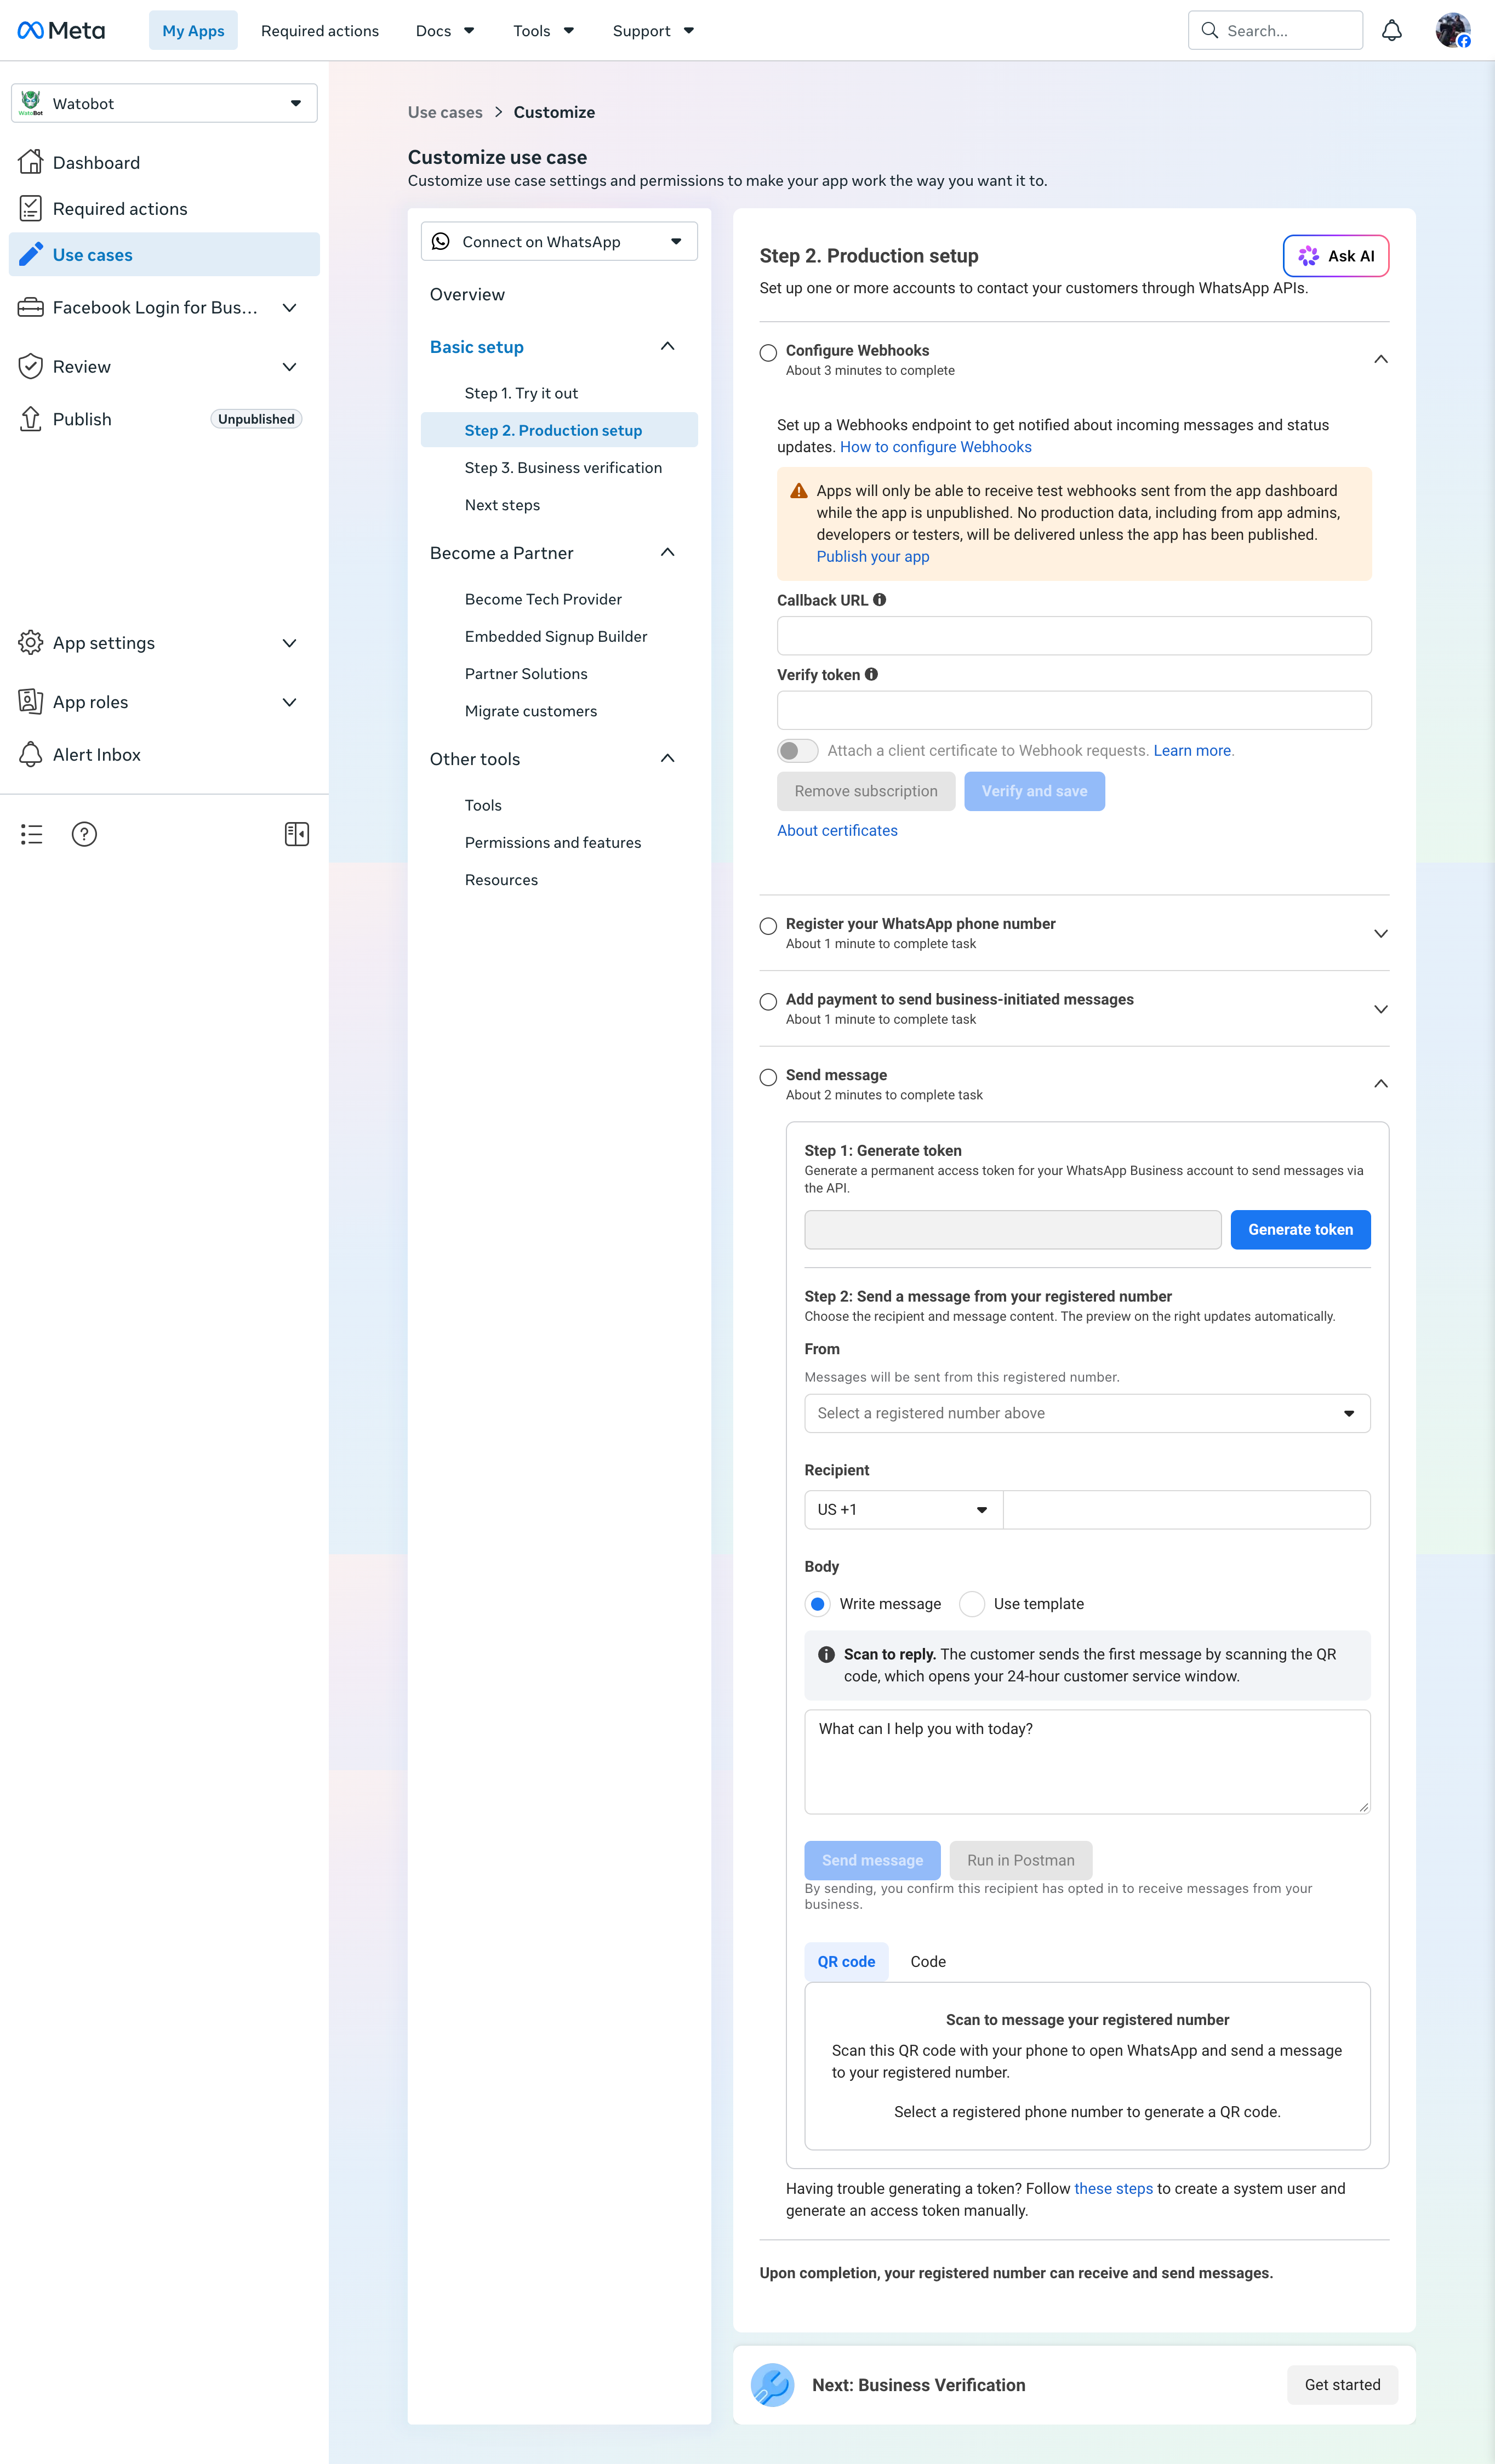
- Under Basic setup, go to Step 2. Production setup. Step 1. Try it out is only for first tests with Meta's test number.
- Complete Register your WhatsApp phone number and Add payment to send business-initiated messages. The token step needs a registered number.
Get an access token and send a message
To send messages you need an access token. You don't need the App ID or App Secret for this.
- Open Send message, and under Step 1: Generate token click Generate token. Meta describes this as a permanent access token for your WhatsApp Business account. Copy it and store it somewhere safe.
- Under Step 2: Send a message from your registered number, choose your number, enter a recipient and a message, and send it. The recipient should receive it in WhatsApp.
If that doesn't work: create a system user token
Meta links to this manual route from the same screen when token generation fails.
- Open Business Settings at business.facebook.com/latest/settings and choose the right portfolio from the switcher at the top left. Then go to Users → System users and click + Add. Name it, and pick the Admin or Employee role.
- Click Assign assets and give the system user Manage app control over your app. Also assign your WhatsApp account so the token can reach it.
- Click Generate token, select your app, and choose an expiration.
-
Select the permissions
business_management,whatsapp_business_managementandwhatsapp_business_messaging, then copy the token. Store it somewhere safe, because Meta won't show it again.
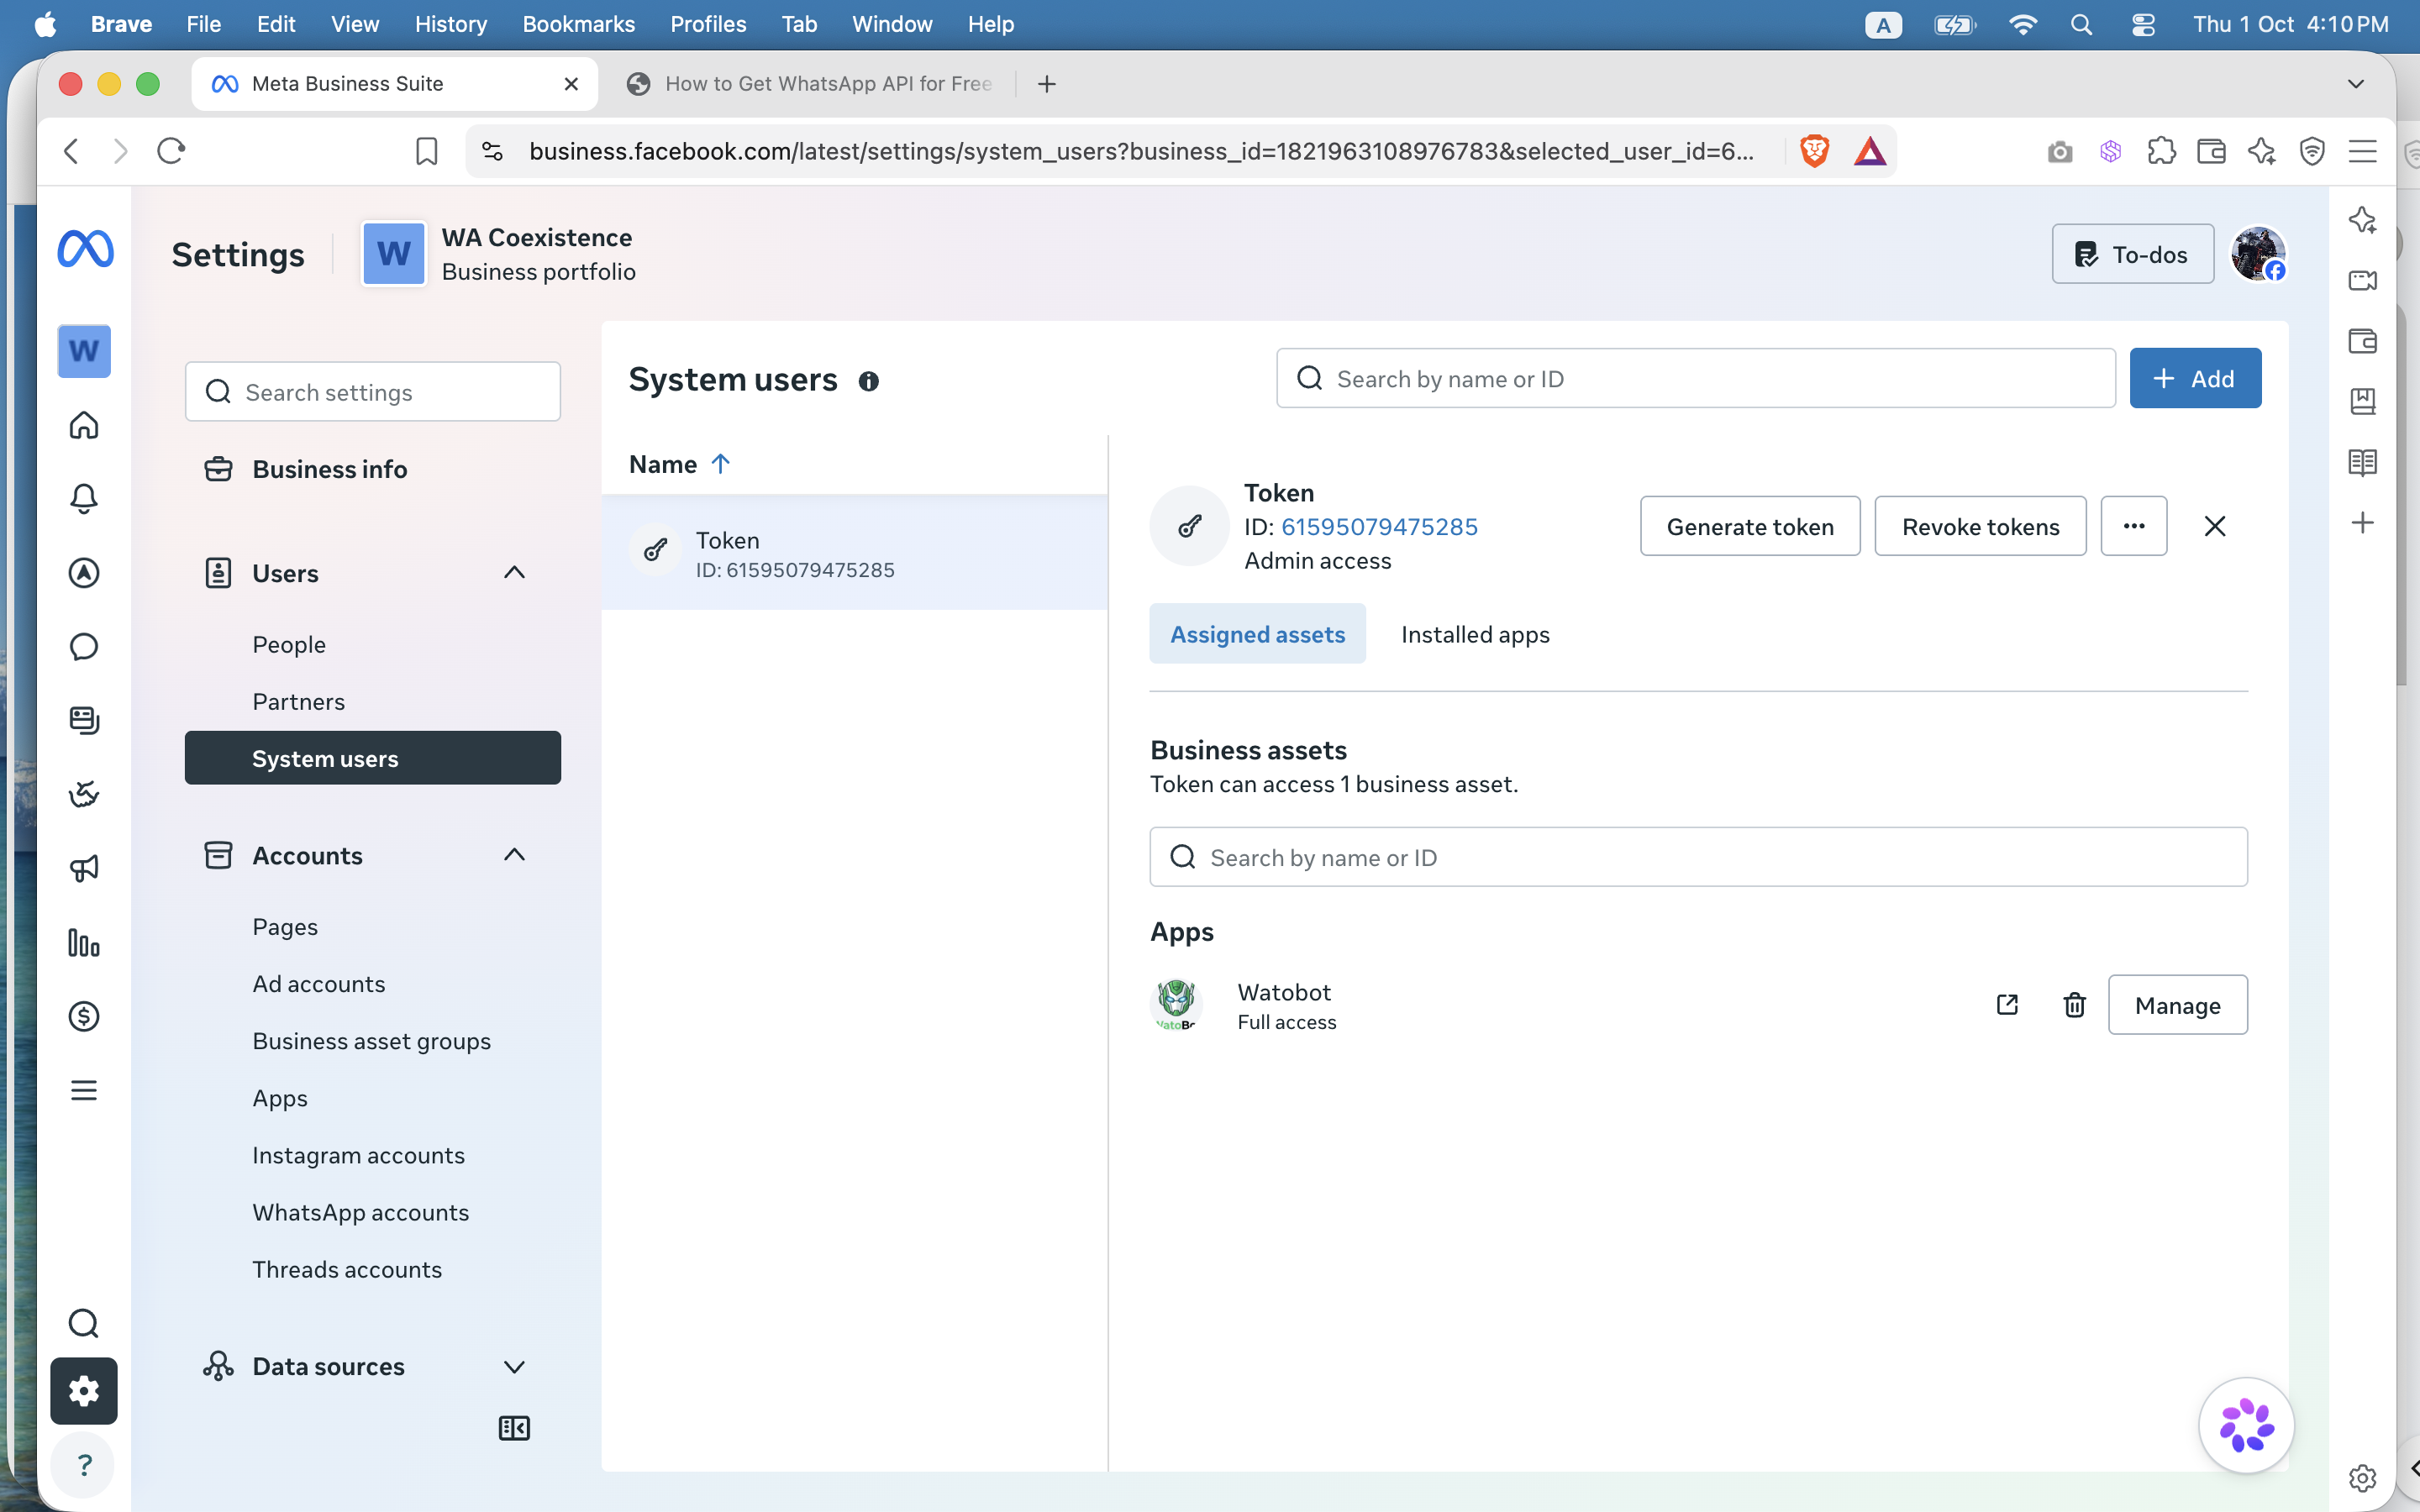
Source: Access tokens — Meta for Developers. Exact button names can change as Meta updates the dashboard.
Receive incoming messages: set up the webhook
WhatsApp delivers messages people send to your number by calling a URL you provide, so your app needs to be reachable over public HTTPS.
- In Step 2. Production setup, open Configure Webhooks. Enter your app's URL as the Callback URL, and a Verify token: any string you choose, which your app must check when Meta calls it.
Don't have an app yet? Set up our
test chatbot.
It runs on your computer, gives you a public HTTPS URL to use as the
Callback URL, and shows incoming messages in its logs. Use the same
verify token in its .env and here.
.dashboard-webhook-setup.png)
Use your own URL and verify token here.
- Click Verify and save. Meta sends your URL a verification request, and your app must answer it correctly.
-
You can see your app's permissions under Permissions and
features (under Other tools in the left
menu). The WhatsApp use case adds them for you:
whatsapp_business_messagingsends messages, andwhatsapp_business_managementis for managing templates and account settings through the API. On your own number they work at Standard Access, so there is nothing to add and no app review. Don't request Advanced Access.
.permissions.png)
-
Back in Configure Webhooks, scroll to the
Webhook fields list. Make sure
messagesis set to Subscribed. Meta subscribes the common fields for you, but it is worth checking, since without it you won't receive incoming messages.
.dashboard-webhook-fields.png)
- Send a WhatsApp message to your number from another phone. It reaches your app. With the test chatbot, you'll see it in its logs.
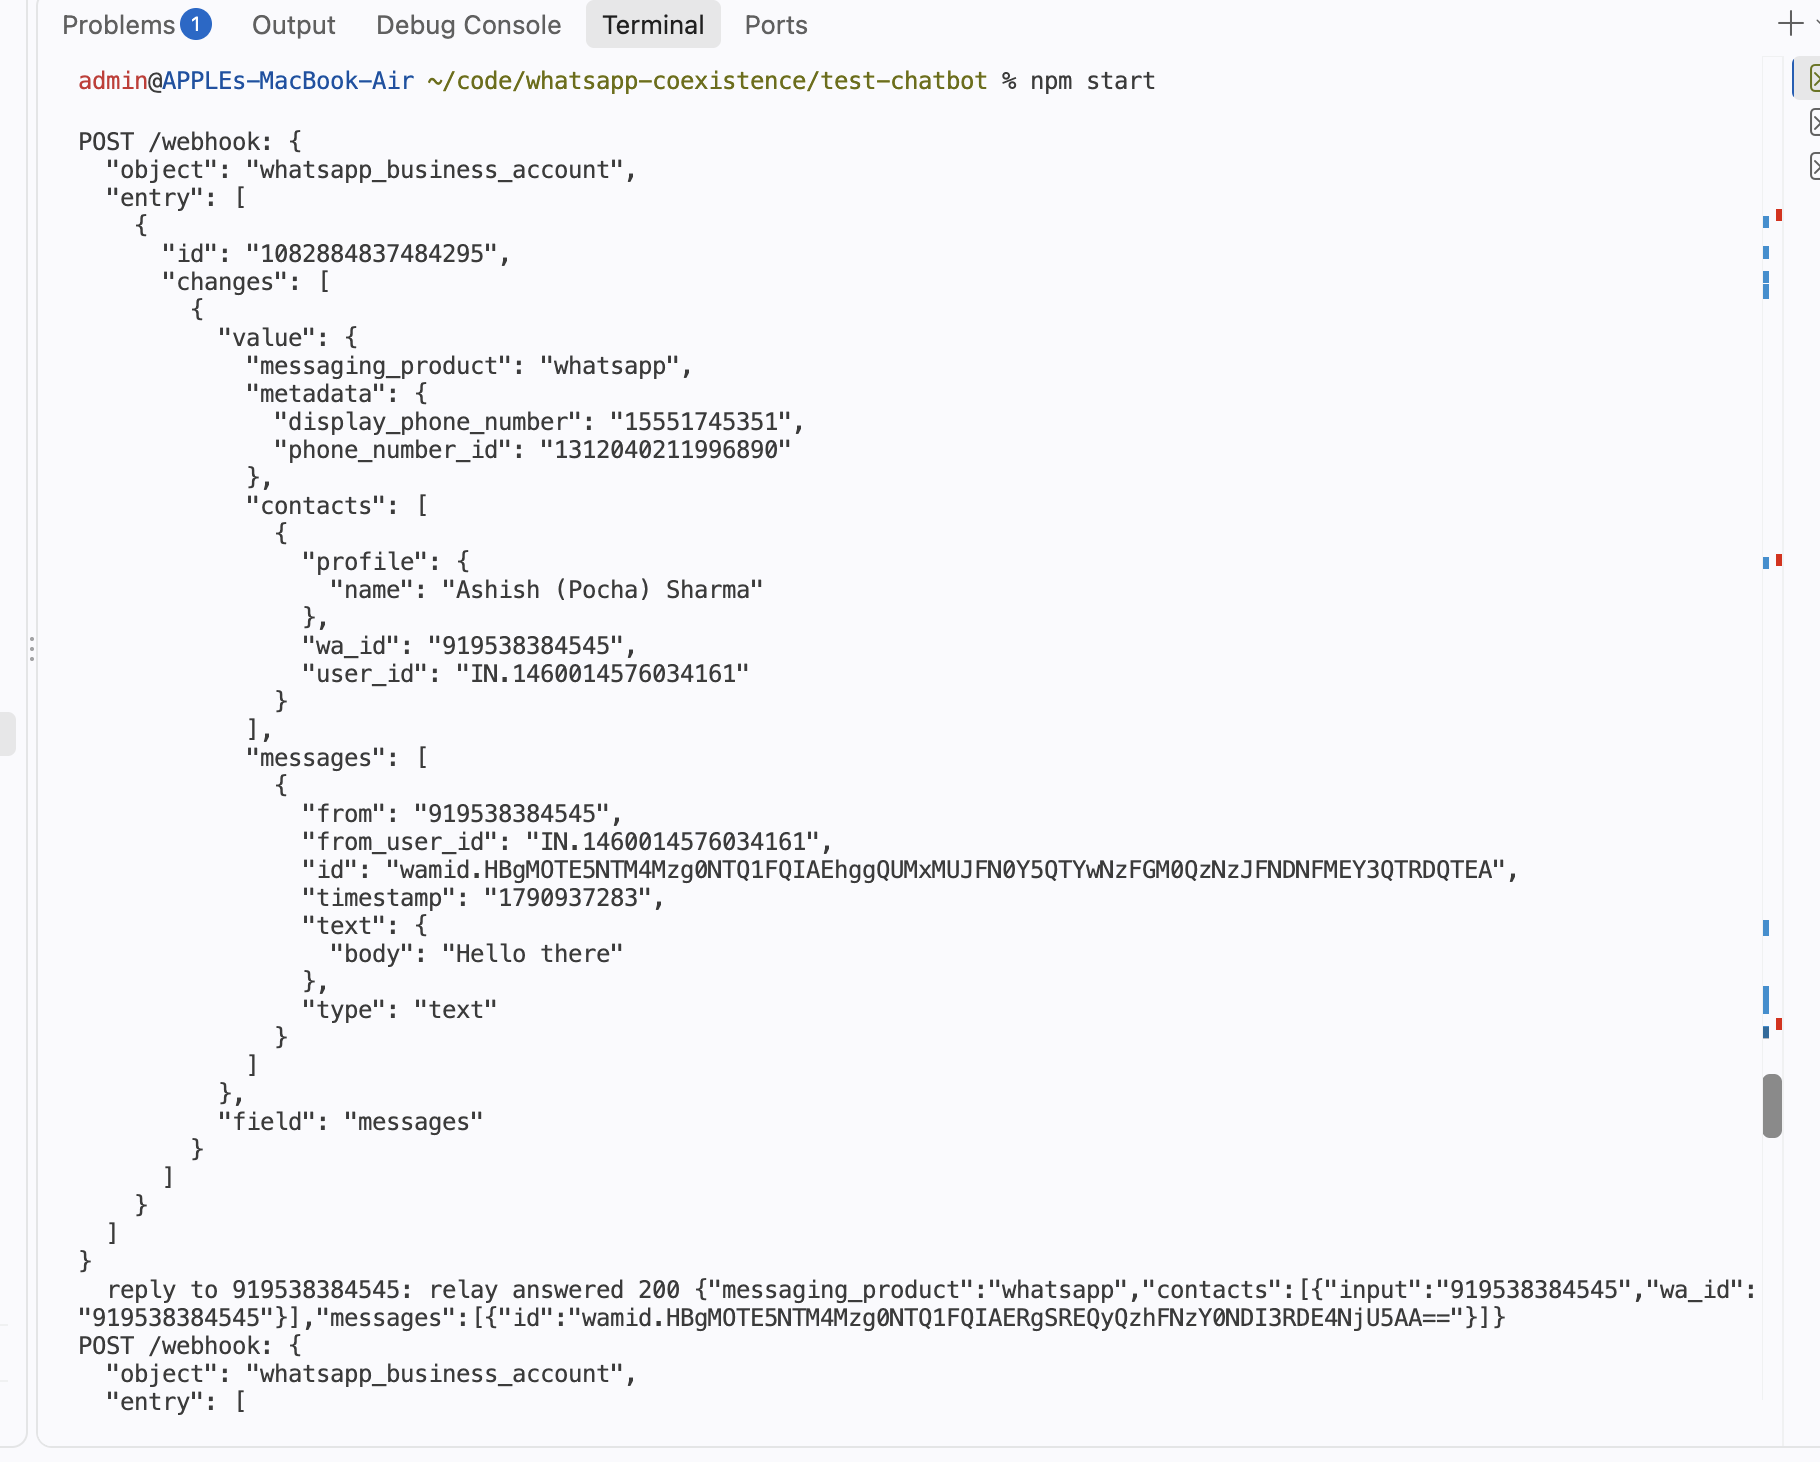
The test chatbot's logs: the incoming message event, then its reply going out through the relay.
⚠ NO COEXISTENCE ON THIS ROUTE
Getting API access this way does not give you coexistence. A number registered on the Cloud API through your own app can't also be used with the WhatsApp Business app. To keep using the Business app on the same number, use coexistence through us instead. Meta's Business app onboarding doc explains the options.
What you can do for free, and the limits
WhatsApp charges per message that is delivered, not for messages customers send you. Here is what you can do without paying, and where the limits are. These are Meta's rules, and they can change, so check WhatsApp's pricing page.
Messages you start: how many customers you can reach
- A new business portfolio can message up to 250 unique customers per 24 hours with messages it starts. This applies whether or not you are verified.
- You reach 2,000 by verifying your business, or by sending 2,000 delivered messages to unique customers outside customer service windows, with high-quality templates, within 30 days.
- Beyond 2,000, the limit rises automatically (to 10,000, 100,000, then unlimited) as long as you keep quality high and use at least half of your current limit in the past 7 days.
- Replying to customers who message you doesn't count towards this limit.
See Messaging limits and how to verify your business.
Replying to customers who message you
- When a customer messages you first, for example by tapping a WhatsApp button on your website, a 24-hour customer service window opens. Each new message from the customer resets it.
- Inside the window you can send regular (non-template) messages, called service messages. You can only send these inside an open window.
- Each business phone number gets 1,000 free service messages per month. They don't roll over, and the count resets at 12am in your Messaging account's timezone. Meta charges per message from the 1,001st.
- Add a payment method in Billing Hub. Without one, service messages are delivered within the free 1,000 and not delivered after it.
Customers who come from a Click to WhatsApp ad
- When a customer messages you from a Click to WhatsApp ad using the WhatsApp mobile app (desktop and web aren't supported), a customer service window opens.
- If you reply within that window with any type of message, the reply is free and opens a free entry point window of up to 7 days.
- While it is open, marketing, utility, authentication and service messages to that customer are all free.
Messages you start need a template
- To message a customer outside a window, you send a message template. You can create one and wait for Meta's approval, or start from a ready-made template in Meta's template library. Library templates are pre-written and already categorized as utility or authentication, so you can use them as they are without a review. If you customize one, it goes through review.
- Every template has a category, set when it is approved: marketing (promotions), utility (transactional or informational) or authentication (identity verification).
- Meta charges for each delivered template message, at a rate that depends on the category and the customer's country. Utility and authentication messages get lower rates as your monthly volume grows.
- Check the rate cards for your region (rates are in many currencies).